


NDT Techniques: The Top 11 Types of NDT Methods
When inspectors use the term NDT, they’re referring to a group of analysis methods used to evaluate the properties of materials, components, or systems without causing them damage.
These NDT techniques are essential ways for inspectors to collect the data they need in order to make key determinations about the integrity of the assets they’re tasked with inspecting.
NDT methods can vary widely, each suited to different types of materials and detection needs. But they all have the same goal: to help inspectors discover potential issues before they lead to serious failures.
Here are the 11 most common NDT techniques, listed in alphabetical order.
- Visual NDT (VT)
- Thermographic Testing (TT)
- Ultrasonic NDT (UT)
- Acoustic Emission NDT (AE)
- Eddy Current NDT (ET)
- Ground Penetrating Radar (GPR)
- Dye Penetrant NDT (PT)
- Leak Testing (LT)
- Magnetic Particle NDT (MT)
- Radiography NDT (RT)
- Shearography NDT
1. Visual NDT (VT)
Visual Testing (VT), one of the most fundamental forms of Non-Destructive Testing (NDT), involves the inspection of materials, components, and assemblies to identify visible surface defects such as corrosion, misalignments, physical damage, and inconsistencies in workmanship.
This method relies on the direct observation by inspectors, often assisted by tools such as magnifying glasses, mirrors, borescopes, or video equipment to enhance visibility in hard-to-reach areas.
How to Do Visual Non Destructive Evaluation
- Preparation. Clean the object to remove any dirt, grease, or coatings that might obscure surface imperfections. Good lighting is crucial for effective visual inspection.
- Equipment selection. Depending on the inspection requirements, choose appropriate visual aids such as magnifiers, flashlights, or video inspection tools.
- Inspection procedure. Systematically examine the surface of the material. For large or complex surfaces, follow a methodical pattern to ensure no areas are missed.
- Defect identification. Look for any irregularities on the surface that might indicate defects. Use markers or tags to note the locations of flaws for further analysis or repair.
- Reporting. Document the findings with descriptions, measurements, photographs, or video captures. Provide a detailed report that can be used for quality control and maintenance records.
Applications for Visual Non-Destructive Examination
- Power generation. For routine maintenance checks on equipment to prevent failures.
- Construction. For assessing the condition of structures and components like beams, pipes, and welds.
- Manufacturing. To check for surface defects in raw materials and finished products.
- Automotive. Inspecting components during assembly for cracks, scratches, or improper fittings.
Learn more about visual inspections in this in-depth guide.
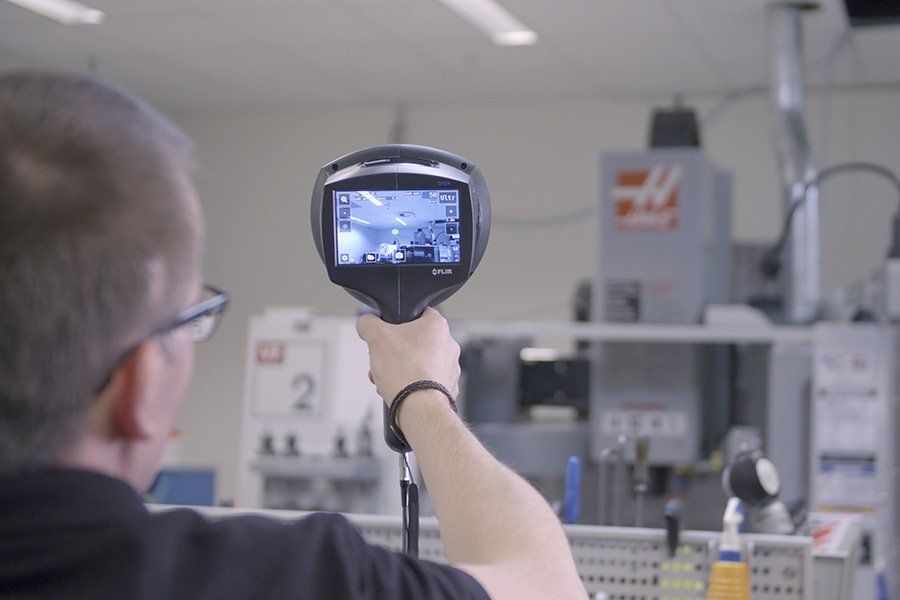
2. Thermographic Testing (TT)
Thermographic Testing (TT), also known as Infrared Testing, is a non-destructive testing technique that utilizes infrared imaging and thermal cameras to detect variations in thermal energy emitted from an object. This method identifies defects in materials by capturing and analyzing the heat signatures that differ from the normal areas due to variations in thermal conductivity caused by flaws such as cracks, voids, or delaminations.

How to Do Thermographic Non Destructive Evaluation
- Setup. Prepare the infrared camera and adjust it to the specific settings required for the material and the type of inspection.
- Thermal equilibration. Allow the test object to reach a thermal equilibrium if necessary, or apply a controlled heat source to enhance thermal contrast.
- Image capturing. Scan the object with the infrared camera systematically to cover the entire area. Capture thermal images that will show different heat patterns.
- Data analysis. Use specialized software to analyze the thermal images. Look for abnormal patterns that indicate potential defects.
- Reporting. Generate a detailed report with thermal images and analysis to provide conclusions and recommendations based on the findings.
Applications for Thermographic Non-Destructive Examination
- Building inspections. Detecting heat leaks, moisture intrusion, and electrical faults in buildings.
- Electrical systems. Identifying overheated components or poor connections in electrical installations.
- Mechanical systems. Monitoring bearings, motors, and other mechanical equipment for overheating issues.
Learn more about thermographic inspections in this in-depth guide.
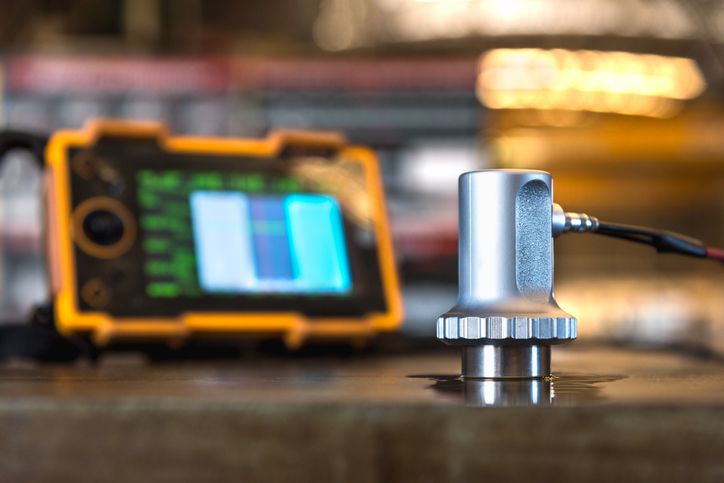
3. Ultrasonic NDT (UT)
Ultrasonic Non-Destructive Testing (UT) is a method used to detect internal flaws, measure thickness, and evaluate material properties through the use of high-frequency sound waves. The technique involves sending ultrasonic wave pulses into a material and then analyzing the waves that are reflected back or transmitted through the material to identify anomalies.
How to Do Ultrasonic Non Destructive Evaluation
- Equipment setup. Prepare the ultrasonic testing device and select the appropriate transducer based on the material properties and the type of inspection required.
- Couplant application. Apply a gel or liquid couplant to the surface of the test object to facilitate the efficient transmission of ultrasonic waves.
- Scanning. Move the transducer over the surface of the material. The device sends sound waves into the material, which reflect back upon encountering flaws or interfaces.
- Signal interpretation. Analyze the signals captured by the transducer. Flaws are indicated by the presence of reflected wave signals before they are expected, or by the absence of expected reflections.
- Documentation. Record the findings and map the location and size of any defects for further evaluation and decision-making.
Applications for Ultrasonic Non-Destructive Examination
- Oil and Gas. Inspecting pipelines and pressure vessels for corrosion and cracks.
- Aerospace. Checking aircraft fuselage and engine components for defects.
- Manufacturing. Quality control of metals and welded joints.
- Automotive. Evaluating critical components like engine blocks and axles for internal defects.
Learn more about ultrasonic testing in this in-depth guide.
4. Acoustic Emission NDT (AE)
Acoustic Emission (AE) Non-Destructive Testing is a method used to monitor changes in the internal structure of materials by detecting transient elastic waves, which are generated when a material undergoes deformation due to mechanical stress.
How to Do AE Non Destructive Evaluation
- To conduct AE testing, sensors are strategically placed on the surface of the structure or material being inspected.
- These sensors capture the high-frequency waves produced by the release of energy from sources such as cracks forming or growing.
- The data collected is then analyzed to determine the location and severity of any potential issues.
- Testing is often performed under load to ensure that active faults are detected.
Applications for AE Non-Destructive Examination
- Pressure vessels and storage tanks. For detecting corrosion and cracks.
- Bridges and civil structures. For monitoring structural integrity.
- Aerospace components. For fatigue crack detection.
Learn more about acoustic emission testing in this in-depth guide.
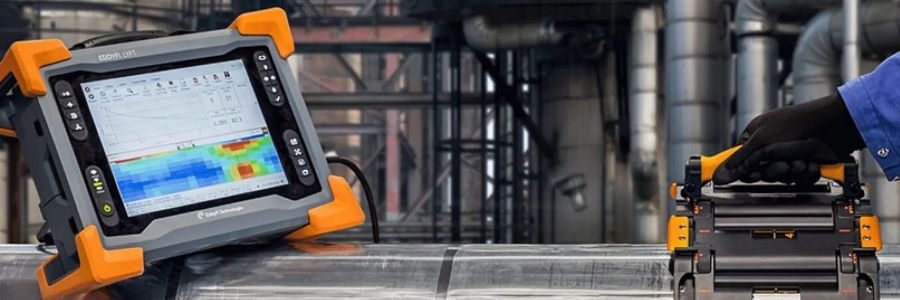
5. Eddy Current NDT (ET)
Eddy Current Testing (ET) is a non-destructive testing method that utilizes electromagnetic induction to detect flaws in conductive materials. It involves generating a circular electric current (eddy current) within the material using a coil carrying an alternating current. The interaction of the eddy currents with the material helps identify discontinuities based on changes in the current’s flow pattern.
How to Do Eddy Current Non Destructive Evaluation
The process of conducting Eddy Current Testing typically includes the following steps:
- Equipment Setup: Configure the eddy current instrument and select the appropriate probe based on the material and type of inspection.
- Calibration: Calibrate the instrument using standards that are similar in conductivity and geometry to the test specimen.
- Scanning: Move the probe along the surface of the material. The probe sends alternating current through the material, creating eddy currents.
- Data Analysis: Monitor the readings on the eddy current instrument; fluctuations in the eddy current’s impedance indicate flaws.
- Interpretation: Analyze the data collected to determine the location, size, and possible type of flaw.
Applications for Eddy Current Non-Destructive Examination
- Aerospace. For the inspection of aircraft fuselage and engine components.
- Manufacturing. To check the integrity of metal tubes and bars in production lines.
- Automotive. For detecting cracks or corrosion in engine parts and automotive structures.
Learn more about eddy current testing in this in-depth guide.
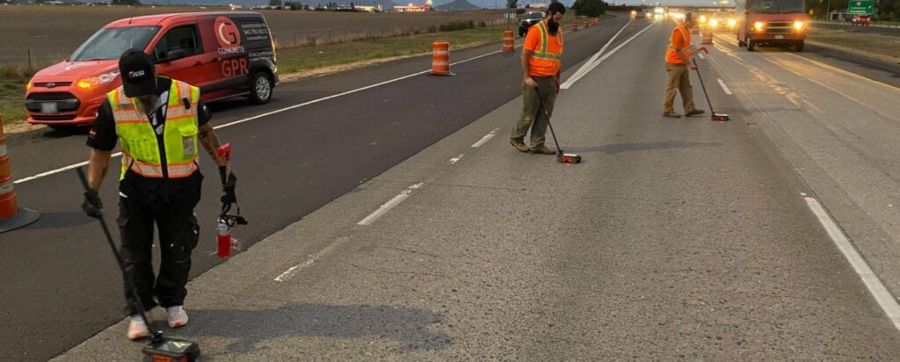
6. Ground Penetrating Radar (GPR)
Ground Penetrating Radar (GPR) is a non-destructive testing method that uses radar pulses to image the subsurface. This technology involves emitting high-frequency radio waves into the ground and recording the echoes that return from subsurface structures to create images or profiles of subsurface features. GPR can detect objects, changes in material, voids, and cracks.
How to Conduct GPR Non Destructive Evaluation
- Setup equipment. Assemble the GPR system which typically includes a control unit, antenna, and data recording unit.
- Survey planning. Map out the area to be surveyed and define the grid for the scans to ensure comprehensive coverage.
- Data collection. Push or tow the GPR equipment over the target area. The radar waves penetrate the ground and reflect signals back to the antenna.
- Data interpretation. Use software to analyze the radar data and construct an image of the subsurface. Different materials and structures will reflect waves differently, creating a profile of the area below.
- Reporting. Generate reports based on the radar data with interpretations of subsurface anomalies and recommendations for further action if needed.
Applications for GPR Non-Destructive Examination
- Civil engineering. To locate rebar in concrete, measure thickness, and detect voids beneath surfaces.
- Utility location. For finding and mapping underground utilities such as pipes and cables.
- Environmental studies. For mapping soil layers, finding underground storage tanks, and identifying contaminated sites.
- Archaeology. To detect and map archaeological features without excavation.
Learn more about ground penetrating radar NDT in this in-depth guide.
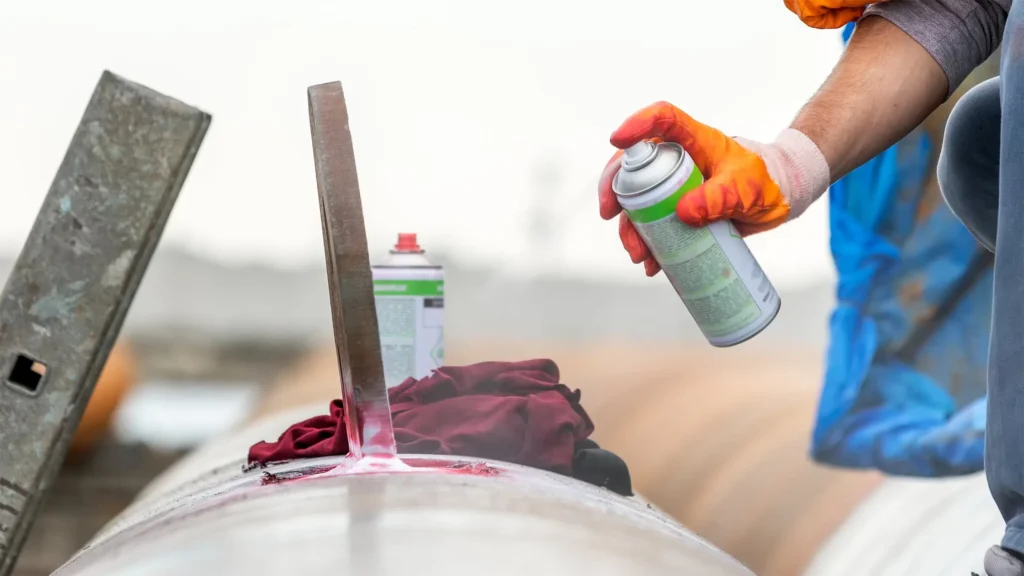
7. Dye Penetrant NDT (PT)
Dye Penetrant Inspection (DPI), also known as Liquid Penetrant Inspection (LPI) or Penetrant Testing (PT), is a widely used Non-Destructive Testing (NDT) method that helps to detect surface-breaking defects in non-porous materials. This method involves applying a liquid dye to the surface of the material, which penetrates into any flaws and is then drawn out to reveal defects through visible inspection.
How to Do Dye Penetrant Testing Non Destructive Evaluation
Here are the key steps for penetrant testing:
- Pre-cleaning. The surface of the material is cleaned to remove any dirt, oil, or other contaminants that might prevent dye penetration.
- Application of penetrant. A visible or fluorescent dye is applied over the surface.
- Dwell time. The penetrant is left to soak into any surface breaks for a specific period.
- Excess penetrant removal. The excess penetrant is carefully cleaned off the surface.
- Developer application. A developer is applied, which helps draw out the penetrant from the defects to create a visible indication.
- Do the inspection. The final step is the visual inspection under appropriate lighting conditions to identify any indications that represent defects.
Applications for Dye Penetrant Non-Destructive Examination
- Aerospace. For inspections of critical components such as turbine blades and fuselage structures.
- Automotive. In checking casting, forgings, and welds on vehicle components.
- Metal fabrication. To ensure the integrity of structural components.
Learn more about dye penetrant testing in this in-depth guide.
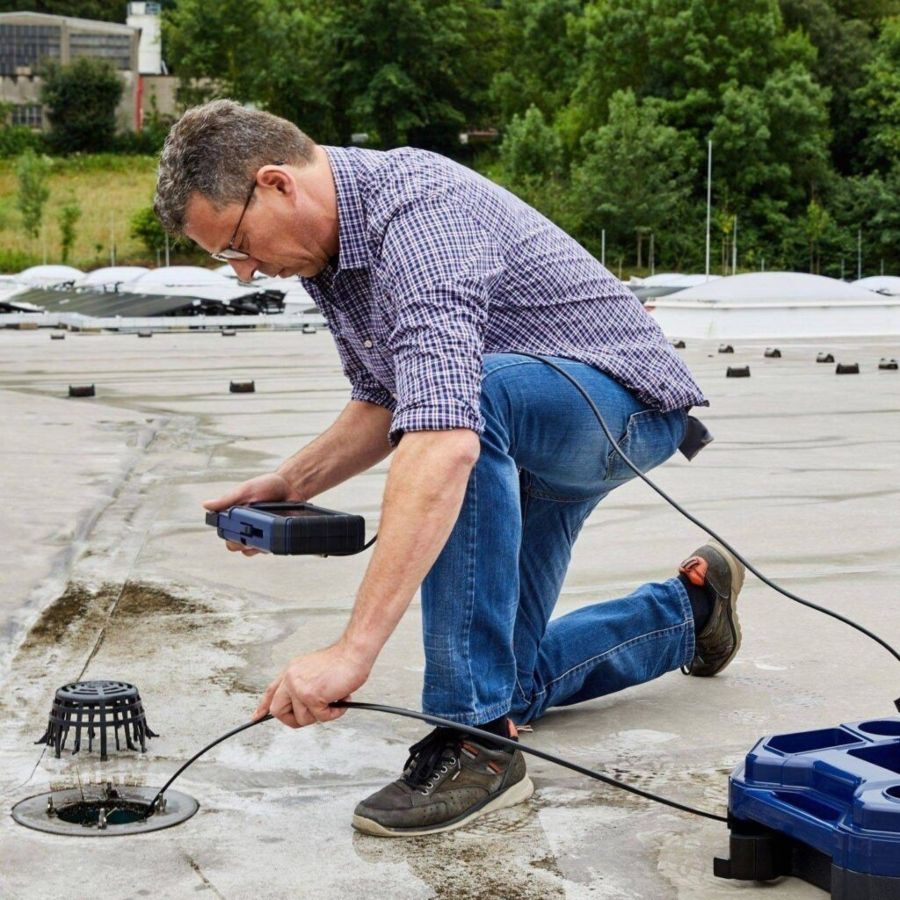
8. Leak Testing (LT)
Leak Testing (LT), also known as Leak Detection, is a non-destructive testing method used to check systems and containers for leaks and to ensure their integrity and tightness. This method involves the application of pressure or vacuum to a system and monitoring it for changes, which can indicate the presence of a leak. Various techniques such as bubble testing, pressure decay, and helium sniffing are employed based on the required sensitivity and the nature of the system being tested.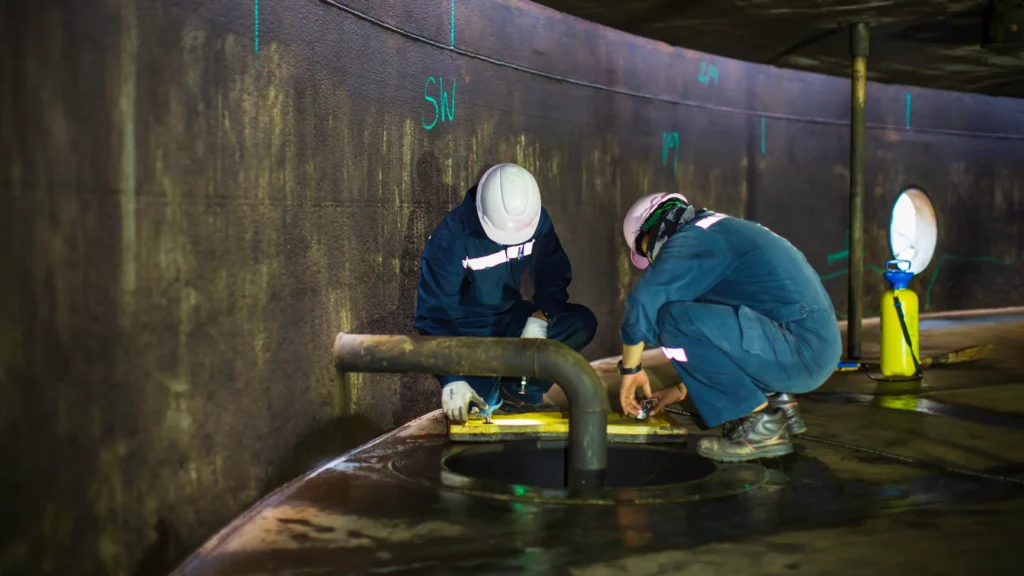
How to Conduct Leak Testing Non Destructive Evaluation
- Preparation. Ensure the test object is clean and dry. Any contaminants or moisture can affect the results.
- Sealing. Close off all ports and connections of the test piece except where the test medium (air, water, helium) will be introduced.
- Testing. Introduce the test medium into the system. For vacuum tests, evacuate the air inside the test object.
- Monitoring. Observe for a predetermined time for signs of the test medium escaping, using methods appropriate to the medium (e.g., soap solution for bubble tests, electronic detectors for gas tests).
- Data analysis. Measure and record the rate of pressure change or detect the presence of test medium outside the test object, which would indicate a leak.
Applications for Leak Testing Non-Destructive Examination
- Pharmaceutical. Ensuring the integrity of packaging to maintain sterility.
- Automotive. Testing fuel systems, radiators, and air conditioning units for leaks.
- Aerospace. Checking the tightness of hydraulic systems and fuel tanks.
- Manufacturing. Verifying the leak-tightness of valves, tanks, and vessels.
Learn more about leak testing in this in-depth guide.
9. Magnetic Particle NDT (MT)
Magnetic Particle Testing (MT), also known as Magnetic Particle Inspection, is a non-destructive testing technique used to detect surface and slightly subsurface discontinuities in ferromagnetic materials. This method utilizes a magnetic field and ferrous particles suspended in a liquid or dry form to reveal defects. The magnetic field causes the particles to gather at any surface flaws, creating a visible indication under proper lighting conditions, especially when using fluorescent particles.
How to Do Magnetic Particle Non Destructive Evaluation
- Surface preparation. Clean the test surface to remove any dirt, grease, or paint that might inhibit particle movement.
- Magnetization. Apply a magnetic field to the test material using direct or indirect magnetization techniques. The method chosen depends on the material’s geometry and the type of defect sought.
- Application of particles. Sprinkle or spray magnetic particles over the area being tested while the part is magnetized.
- Inspection. Observe the test surface under appropriate lighting. Any discontinuities will attract the particles, forming visible indications.
- Demagnetization. If necessary, demagnetize the component to remove any residual magnetic field, which could affect its future use or further testing.
Applications for Magentic Particle Non-Destructive Examination
- Oil and Gas. Inspecting pipelines and drilling equipment for stress corrosion cracks.
- Aerospace. Checking aircraft components for cracks due to fatigue.
- Automotive. Testing critical safety components like axles, rods, and gears.
- Manufacturing. Quality control of castings, forgings, and welds during production.
Learn more about magnetic particle inspection in this in-depth guide.
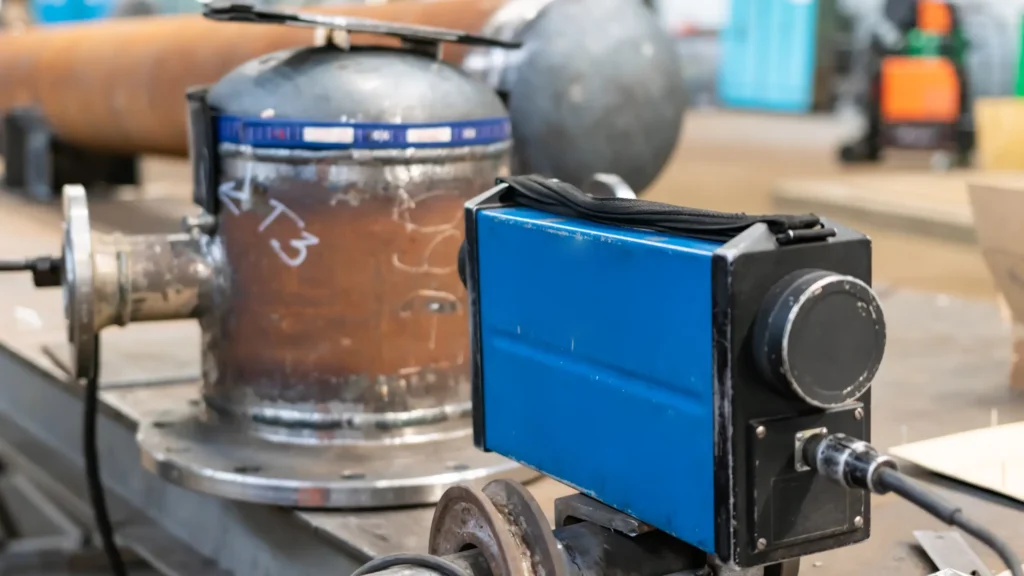
10. Industrial Radiography NDT
Radiography Testing (RT), or radiographic inspection, is a non-destructive testing technique that uses X-rays or gamma rays to view the internal structure of a component. By exposing a part to radiation and capturing the image on a detector or film, differences in material density and variations in thickness are highlighted, revealing defects such as cracks, voids, or inclusions.
How to Do Radiography Non Destructive Evaluation
- Preparation. Isolate the component and ensure that it is free from any external materials that could interfere with the imaging process.
- Safety measures. Set up appropriate safety barriers and warning signs to protect operators and nearby personnel from radiation exposure.
- Exposure. Position the radiation source on one side of the object and the film or detector on the opposite side. The radiation passing through the object creates an image that reflects its internal structure.
- Development and analysis. Develop the film in a darkroom setting (for traditional film) or process the digital image. Analyze the image for any irregularities that indicate defects.
- Reporting. Document the findings and provide recommendations based on the analysis.
Applications for Radiography Non-Destructive Examination
- Oil and Gas. Examining pipelines and pressure vessels for corrosion and weld quality.
- Construction. Assessing structural integrity in steel and reinforced concrete.
- Aerospace. Inspecting components for cracks and material integrity to ensure flight safety.
- Automotive. Checking welds and castings in critical vehicle parts.
Learn more about industrial radiography in this in-depth guide.
11. Shearography NDT
Shearography, a non-destructive testing (NDT) method, is used primarily to detect defects in composite materials, laminates, and bonded structures. This technique utilizes the optical measurement of surface deformations caused by stress differences when an object is subjected to mechanical, thermal, or vacuum stress. Shearography provides a quick and effective means of examining large areas to identify subsurface anomalies like delaminations, voids, and other defects.
How to Do Shearography Non Destructive Evaluation
- Setup and calibration. Position the shearography camera system to focus on the target area. Calibrate the device according to the specific test requirements.
- Application of stress. Apply stress to the material through mechanical load, heat, or vacuum, depending on the nature of the test object and the expected types of defects.
- Capturing images. Capture the initial and stressed states of the object’s surface using the shearography equipment. The camera records changes in the interference pattern of the laser light reflected from the surface.
- Data analysis. Analyze the captured images to detect any distortion patterns that indicate defects.
- Documentation. Document the findings with photographic evidence and detailed reports on the detected anomalies.
Applications for Shearography Non-Destructive Examination
- Aerospace. Inspecting aircraft composites and honeycomb structures for integrity and damage.
- Automotive. Examining car tires and composite body parts for hidden defects.
- Manufacturing. Quality control of composite materials used in various industrial applications.
- Marine. Checking the integrity of fiberglass and composite boat hulls.
Emerging NDT Techniques
Advancements in the sphere of non-destructive testing technology are at the forefront of modern industrial progression, amalgamating innovation with precision to elevate the efficacy of inspection processes.
Here are some of the top emerging NDT techniques:
- Total Focusing Method (TFM)
- Laser Shearography
- Infrared Thermography
- Terahertz NDE
These techniques are bolstering the capacities of NDT, rendering it more proficient in deciphering material inconsistencies and abnormalities.
The trajectory in NDT is also characterized by an increasing prominence of ultrasonic testing, projected to lead the way in future trends. The ever-evolving market dynamics necessitate a continuous refinement in ultrasonic testing methodologies, ensuring that they remain attuned to the emerging complexities and the escalating demand for more sophisticated inspection techniques.
Including wireless connectivity with test probes and sensors is another milestone in NDT’s evolution. This revolutionary modification has paved the way for real-time data processing and enhanced data interpretation capabilities, rendering the sector more agile and responsive.
Advancements in NDT technology are instrumental in steering the professional inspection landscape towards unprecedented horizons.
The convergence of emerging technologies, integrated solutions, and innovative methodologies is fortifying the foundation of non-destructive testing, ensuring its sustained relevance and adaptability in the face of the ever-evolving industrial ecosystem.